

Using a Free 3D Builder
Learning how to design a shed starts with deciding what you need to store, how much space you have, and which layout will work best. Before buying materials or starting construction, it's worth exploring different sizes, roof styles, and door positions. With The Shed Nerd's free 3D Shed Builder, you can create a visual shed design, adjust its dimensions, and view it from different angles to help plan your project.
1. Decide What Your Shed Will Be Used For
Start by thinking about how you'll use your shed. A small garden shed might only need room for tools, a lawn mower, and a few shelves. A larger storage shed could accommodate bicycles, outdoor equipment, or a workbench.
Consider how often you'll access the shed and whether you'll need room to move around inside.
Think about future storage needs, too. Building a slightly larger shed may be more practical than discovering you need additional space a year later.
2. Choose the Right Shed Dimensions
Choosing suitable dimensions is one of the most important steps when designing a shed.
Common shed sizes include:
8 × 10 ft: A practical option for garden tools and smaller equipment.
10 × 12 ft: Offers additional storage and room for shelving.
12 × 16 ft: Suitable for larger equipment or a small workshop.
12 × 20 ft: Provides more flexibility for storage and work areas.
Measure your available space before settling on a size. Allow room around the shed for maintenance, drainage, and access.
You'll also need to check local building regulations, setback requirements, and whether a permit is necessary.
Our 3D Shed Builder lets you enter the length, width, and wall height of your proposed shed. You can also switch between imperial and metric measurements.
3. Compare Different Shed Roof Styles
Your roof design affects the shed's appearance, available headroom, and how rainwater drains away.
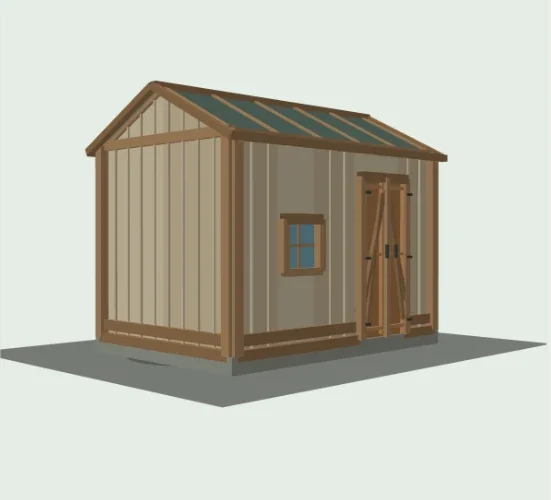
The free 3D Builder includes four roof styles.
Gable roof: A traditional design with two sloping sides meeting at a central ridge. It's a popular choice for garden and storage sheds.
Lean-to roof: Features a single sloping roof surface. This straightforward design can work well for smaller sheds and modern layouts.
Gambrel roof: Has two slopes on each side, creating the familiar barn-style appearance. It can provide additional headroom beneath the roof.
Hip roof: Slopes down toward all four walls, giving the shed a balanced appearance without vertical gable ends.
You can compare these designs in the interactive model and adjust the available roof pitch settings to see how the shed's profile changes.
4. Plan Your Doors and Windows
Door and window placement can make a big difference to how useful your finished shed will be.
For a storage shed, consider positioning the entrance where you can easily move larger items in and out. Double doors may be helpful when storing equipment such as lawn mowers or bicycles.
Windows can provide natural light, particularly if you're planning to use the shed as a workshop.
Using the free 3D Shed Builder, you can select different walls for doors and windows, adjust their dimensions, and see where they fit within your design.
The tool also displays a warning when requested openings cannot fit within the available wall space. This helps you identify layout problems before construction begins.
5. Preview Your Shed Design in 3D
One advantage of using a 3D shed design tool is being able to see your ideas from different perspectives.
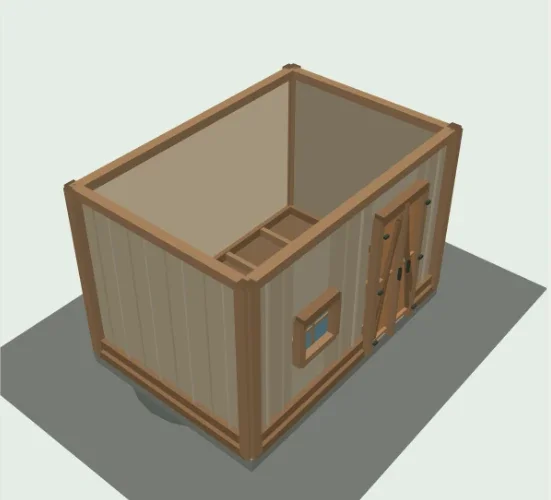
Instead of relying entirely on sketches, you can rotate the model and inspect the shed from the front, back, sides, or above.
You can also hide the roof surfaces to get a clearer look at the framing and interior arrangement.
Try changing the shed dimensions or roof style while keeping the same door and window layout. Comparing several options can help you decide which design suits your available space.
The 3D preview is intended for planning and visualisation. Before building, you'll still need suitable construction drawings, structural specifications, and any required approvals.
6. Estimate Your Shed Building Materials
Once you've chosen a design, the next step is estimating the materials required.
The Shed Nerd's free Shed Material Estimator Calculator can help you prepare a preliminary materials list based on your shed dimensions and selected construction options.
The calculator provides estimates for items such as floor framing, wall studs, roof framing, sheathing, siding, and roofing materials.
It also supports different foundation options, roof styles, and door and window configurations.
The 3D Builder and Material Estimator are separate tools, so you'll need to enter your chosen dimensions and options into the calculator.
Treat the results as planning estimates rather than a final purchasing list. Always check quantities, structural requirements, and local building standards before ordering materials.
7. Review Your Design Before Building
Before committing to your shed design, check that it meets your practical needs.
Make sure doors have enough clearance, windows are positioned sensibly, and the roof style suits your location.
Consider drainage, ventilation, access, and how the shed will sit on its foundation.
It's also worth reviewing your available budget and choosing suitable building materials for your climate.
Taking time to plan these details can help reduce costly changes during construction.
Start Designing Your Shed Today
Learning how to design a shed becomes easier when you can experiment with different layouts before building.
Start with our free 3D Shed Builder to explore shed dimensions, roof styles, doors, and windows. Once you've settled on a design, use the Shed Material Estimator Calculator to help plan the materials for your project.
With both tools, you can move from an initial shed idea to a more organised building plan.
Ready to Design Your Own Shed?
Bring your shed ideas to life with The Shed Nerd's free 3D Shed Builder. Choose your dimensions, explore different roof styles, add doors and windows, and preview your design from every angle before you start building.